General:
This section controls all the features of the Dating Plugin. A vast range of function options and their general use are discussed below.
Skype Mode: This feature lets members connect with each other through skype.
- When “On”: “Skype” sub-menu under “Settings” menu will be visible.
- When “Off”: “Skype” sub-menu under the “Settings” menu will disappear.
See, how you can integrate your profile with Skype.
Zip Codes: Users can search with the help of “Zip Codes”. Also, users will be prompted with the “Zip” option on the Edit Profile page.
- When “On”: “Zipcode” sub-menu will appear under the menu “Search”.
- When “Off”: “Zipcode” sub-menu will disappear under the menu “Search”.
Near Me:
- When “On”: “Near me” sub-menu under “Search” menu will be visible.
- When “Off”: “Near me” sub-menu under the “Search” menu will disappear.
See how you can use the Near Me feature.
Instant Messenger: This feature will be open to all standard members if the site is in free mode and can be controlled through premium membership. This will appear beside the Edit Profile and Media of the member’s profile Navigation. The members will be able to chat with each other by visiting the profile and clicking on the chat icon beneath their profile image.
IM Recipient: This feature is related to receiving messages sent by other users. (Enable email option from 9 should be “On”)
- When “On”: Only users with “Premium Membership” will be able to view the received emails.
- When “Off”: Members will not be able to receive messages sent by other users(members)
Search Results: This feature determines the number of results to be shown per page in search results. The inputted number will determine the number of search results to be shown on a page.
Front Page Results: This feature allows the admin to limit the number of search results per page
Group Chat Mode:
- When “On”: Allows members to use the group chat feature
- When “Off”: This feature will be disabled.
One to One Chat:
- When “On”: Enabling this option will add the chat icon below the image of the user on the member’s profile page.
- When “Off”: Chat icon under the image of the user will disappear.
Import Zip codes: When the admin imports the zip code, members will have the option to fill in the zip codes while editing or filling in their profile information. These zip codes entered by your members will also be implemented in the Search feature. The zip Code search feature can also be controlled through premium membership.
Pagination Color: The Plugin allows the option to select your pagination color for search results and other pages where pagination comes into effect. With this, you can easily set the pagination colors according to your needs. Default is ff6103 for the D’zonia Theme.
Tab Color: You can set the tab color option for the Members Page tabs. This will set the color for both the top menu and sub-menu tabs generated by the Plugin.
Non-Active Tab Color: By providing value for Non-Active Tab color, you can differentiate between the active tabs and non-active tabs. You can use this and the Tab Color option to match the Plugin’s member tab with your website design.
Button Color: To change the Submit button color on the search or Send Message button after composing an email or Update button after editing the profile or such, you can provide the color value here.
Title Color: Providing a different color value to this option will change the font color of the title given inside the members’ page. Like when you click Email and then Compose you see New Email, and the color of such texts will be changed.
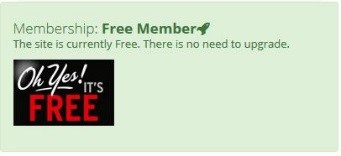
Free Mode:
- When “On”: The user will be able to use the plugin without paying for the upgrade. Once the free mode is selected “On” another drop selection of gender will appear.
– Selecting “male” and “Female” will only make the site free for the selected gender.
– “Free member” will be displayed on the profile page of the user.
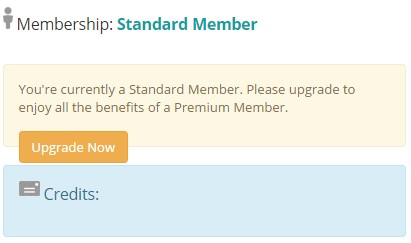
- When “Off”: The user will have to upgrade to use all the functions.
– “Standard member” will be displayed on the profile page of the user
Guest Limit Profile: This feature determines the number of profile views that a guest can make.
- When “On”: An option to enter the number to set the limit will appear. This will determine the number of profiles guests can view.
- When “Off”: This will let guest users view as many profiles as they want.
Free Trial:
You can offer Free Trial to users when the Free Mode is turned off.
- When “On”: Users can use the website for free for the certain number of days that you set.
->Gender
– Selecting “Male” and “Female” will only make the site free for the selected gender. Select ‘both’ to offer a free trial to both genders.
->Days
– Put the number of days that the selected gender can the website on the free trial.
- When “Off”: Free trial is not offered to members.
Gateways:
If you have disabled the free mode on the site, this feature enables payment gateway modes where your money comes to your account.
- When “On”: Payment gateway mode is activated, and you can configure the settings for different gateways like PayPal, Stripe, Mollie, etc. You can access the gateway settings in the different tab under DSP Admin > Settings.
- When “Off”: Payment gateway mode is turned off, and users won’t get to make payments.
Credits:
This section enables/disables the Credits feature.
- When “On”: Credits are needed to send messages and gifts.
- When “Off”: Messages and gifts can be sent for free.
Discount Codes: This feature helps users to enter discounts on payments (created from the Discount Codes sub-menu in DSP Admin) when upgrading the membership plans.
- When “On”: Activates discount code option in membership upgrade.
- When “Off”: No discount codes will be available and the new members must pay to upgrade their membership.
Virtual Gifts: This feature helps the admin to regulate the feature of “Virtual gifts”
- When “On”: a virtual gift icon will appear under the profile of members. Option to enter a maximum number of gifts will open.
- When “Off”: the virtual gift icon will disappear under members’ profile icon.
See how you can send virtual gifts.
Approval:
Authorize profiles:
- When “On”: Profile is created will be automatically approved.
- When “Off”: The user will be shown “Your profile will be updated in 24 hours” and the admin can manually approve the profiles of members.
Authorize Photos:
- When “On”: Photos uploaded will be automatically approved.
- When “Off”: Admin should authorize the uploaded photos.
Authorize Audio:
- When “On”: Audios uploaded will be automatically approved.
- When “Off”: Admin should authorize the uploaded audios.
Authorize Videos:
- When “On”: videos uploaded will be automatically approved.
- When “Off”: admin should authorize the uploaded videos.
Authorize Comments:
- When “On”: Comments added to members’ profiles will be automatically approved
- When “Off”: Admin should manually authorize the comments before being shown to the profile.
Home Page Elements:
Enable Home page Elements:
- New Members: To show a list of New Members beneath the homepage banner of New on your site, you will need to enable this option.
- Online Members: Enabling this option will add the Online Members element to your homepage and will show the members browsing your site at the current time. This feature will need to be turned on if you have used the option to show Random Online Members.
- Happy Stories: This feature will show the Happy Stories section on the homepage. You can add happy stories about members of your dating site from the DSP Admin panel > Tools > Stories.
- Latest Blogs: The blogs that you write and post on your website will be shown on this part of your homepage. This part will not display the blogs that members of your dating site will write on their profiles from the Extras option.
Display options: This setting will provide you with three options to display the elements of a member’s page. You can select to display :
- “Tab Only”
- “Member list up, Tab down”
- “Tab up, member list down”
Enable registration Field: You can enable to turn ON or OFF the First Name and Last Name when your members register on your site. If you have selected to display Full Name in User Profile Display Name, it is recommended to turn this setting on.
Google Recaptcha Setting:
Site Key: Enter your Google Site Key here.
Secret Key: Enter your Google Secret Key here.
Enable Re-captcha: This is used to protect spamming programs to register on your site.
- When “On”: Re-captcha will be enabled.
- When “Off”: Re-captcha will be disabled.
- Note: Please check this link for more instructions: https://contactform7.com/recaptcha-v2/
Activation:
Register Email to Admin:
- When “On”: Admin will be notified when a new member registers. WordPress Admin email will be taken as admin Email.
- When “Off”: Admin will not be notified of a new member’s registration.
Male: Select this option to enable the Male mode. This option is useful if you are planning to run your dating site for one gender only. You can turn off this option to remove the male gender from your site.
Female: This option works similarly to the Male option
Couples: This option works similarly to the Female option.
Force profile: This feature will determine whether a newly registered user without creating a profile can use the search, email, winks, and other functions of the plugin.
- When “On”: The user will be redirected to the “Edit Profile” page when searching or clicking on other users’ profiles from “New members”; to “Online Members”.
- When “Off”: Users who have not created their profile will be able to search for other users without being forced to “Edit Profile”.
Force Photo:
- When “On”: the user will be prompted to upload a profile photo while creating/editing the profile.
- When “Off”: users will be allowed to create/update their profile without uploading a profile photo.
Register Redirect: This feature will redirect guest users who have not created profiles to the page set by the admin.
- When “On”: an option to enter the desired URL will appear.
- When “Off”: guest users who have not created or registered will not be redirected.
After Register Redirect: This feature will help to set the page that admins want newly registered members to be directed to after registering.
- When “On”: an option will appear to input the URL that the admin wants newly registered to be directed to.
- When “Off”: No effects will occur.
After User Register:
- “Auto Login”: the user just registered will be auto-logged on after registration.
- “Email Verification”: users just registered will have to verify through the mail in order to log on.
Video: This feature allows the admin to control the video feature under the “Media” menu
- When “On”: Premium members will be able to access the “Add video” sub-menu under the “media” menu
- When “Off”: Sub menu “Add Video” under “Media” will disappear.
Audio:
- When “On”: Premium members will be able to access the “Add audio” sub-menu under the “media” menu
- When “Off”: Sub menu “Add Audio” under “Media” will disappear.
Match Alert: This feature will let members receive match alerts according to the details set by the member.
- When “On”: Will show the match alert for your members. It will be shown under the Settings of your members’ home page. These members will be able to select the options for if this feature is Active for their profile, which gender and age group they want to receive the match alert email, and at what frequency.
- When “Off”: This feature will be deactivated.
Member List: ShowS members according to the selection on “New members” on “Homepage”.
- When “All”: All the members either male or female will be displayed on the homepage.
- When “Male”: Only male members will be displayed on the homepage.
- When “Female”: Only female members will be displayed on the homepage.
Refresh Rate: This will be used for the notifications and chat requests and chat operations. If you set your refresh rate too low, it will add load to your server resource while setting it too high will make the features dependent on it slow. We recommend it set in between 10-15 if your server is slow and if you are using VPS you can set it to 5-7.
User Profile Display:
- When “Username”: Displays only user name in member’s profile.
- When “Full name”: Displays full name that was used during registration.
My Friends:
- When “On”: Users will be able to see the “Friends” sub-tab under the “Home” menu. Also, members will be able to send friend requests to other users.
- When “Off”: Sub menu “Friends” under the “Home” menu will disappear and members will not be able to send friend requests to other members. Add Friend icon will hide.
See how you can add friends.
Flirt Module: Access to this feature will also be controlled from the premium membership if the site is not on free mode. This feature is responsible for winks.
- When “On”: Members of the dating site will be able to flirt with each other. Members will be able to send winks.
- When “Off”: This feature will be deactivated. Icon for sending winks will be hidden.
See how you can send winks/flirt messages.
Blog: This feature helps to view and add blogs.
- When “On”: Users will be able to access the “Blog” sub-menu from the “Extra” menu
- When “Off”: “Blog” sub-menu under the “Extras” menu will disappear/inactive.
See how you can read blogs.
Picture Gallery: This feature allows the admin to control the picture gallery that will be used by members
- When “On”: Sub menus “Create Album” and “Upload photos” under the “Media” menu will be visible and premium members can access this feature.
- When “Off”: Sub menus “Create Album” and “Upload photos” will be hidden from the “Media” menu.
Date Tracker:
- When “On”: Sub menu “Date Tracker” under “Extras” will be accessible by users.
- When “Off”: Sub menu “Date Tracker” under “Extras” will disappear
Rate Profile: This feature will allow users to rate the profiles of other users simply by visiting the profile of the other user.
- When “On”: user will be able to see rating (rating option for not rated profiles and rating details for rated users) on other users’ profile
-Profile that has already been rated will show the section:
-Profile that has not been rated will show the following sections:
- When “Off”: The rating option and rated score will not be visible on other members’ profiles.
See how you can rate user profiles.
Trending:
- When “On”: “Trending” sub-menu under “Extras” menu will appear.
- When “Off”: “Trending” sub-menu under the “Extras” menu will disappear
Mobile: This feature is deprecated. It was used for a better viewing experience on Mobile devices but as the Plugin and most of the themes are responsive, this feature will not need to be turned on. If you have turned on this feature, while browsing the site, you will get the members page on the home page URL.
- When “On”: While browsing the site, you will get the members page on the home page URL.
Terms Page:
- When “On”: an option to add the URL will be prompted. The first part of the URL is “dsdev.biz/”. and the user can click on “terms and conditions” on the register page to go to the defined URL.
- When “Off”: terms and condition link will be deactivated.
Comments: This feature turns on or off the access to comment on other people’s profile
- When “On”: the comment section appears on the profile of other people.
- When “Off”: the comment section disappears.
Astrological Signs:
- When “On”: The astrological sign will be visible in the member’s profile.
- When “Off”: Astrological signs will not be visible in members’ profiles.
Notification: This feature helps users to notify when someone views their profile or a friend logs on.
- When “On”: a notification will appear.
-According to the position given admin can select where to show the notification
-Also admin can select the time period (seconds) for notification to appear.
- When “Off”: notification will not appear
Meet me:
- When “On”: user will be able to access the “meet me” sub-menu under the “Extras” menu
- When “Off”: “Meet me” sub-menu under the “Extras” menu will disappear.
See how you can use the Meet Me feature.
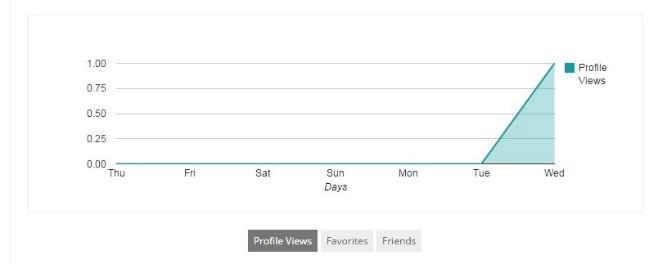
Happening Graph: this feature will give a graphical representation of some activities of the profile.
- When “On”: users will be able to view the graphs of activities such as “Profile Views”; ”Favorites”; ”Friends” etc.
- When “Off”: The graph will not be visible in the profiles.
Settings:
Image Count: You can set the number of images that you want to allow your members to post on their profiles.
Audio Count: With this option, you can define how many audio files can a particular member of your dating site upload to his profile media.
Video Count: This option, similar to the Image Count and Audio Count will provide you the option to set how many videos your members will be able to upload to their profiles. These features can be enabled or disabled from the premium membership.
Make Private:
- When “On”: Users (members) will be able to make their profile image private (cannot be seen by other members).
- When “Off”: Profile pic uploaded will be visible by other members.
Other Settings:
Click on the image to enlarge.
Start Year: This option will control the starting year to be displayed in your Plugin. To control the registration below some age, you can count the years and set the start year to make it 18 and above. If you enter 1997, the year option during registration will only display from 1997, 1996, etc.
End Year: This option will control the ending year for registration in your Plugin. If you want to restrict the age from above 55, you can set the year accordingly here.
Random Online members:
- When “On”: Will provide you with the option to add the number of members that will be shown online.
-Number of Members: Numbers entered will set the number of members that will be shown online
Distance Feature:
- When “On”: The members of your dating site will be able to search for other members on the basis of distance.
- When “Off”: This feature will be deactivated.
See how you can use the Distance Search feature.
Facebook Login Settings:
APP Id: Enter your Facebook APP Id here.
Secret Key: Enter your Facebook Secret Key here
Facebook Login:
- When “On”: Shows Facebook login in your homepage slider. For more information please check this link:https://www.wpdating.com/documentation/setting-up-facebook-login-in-wpdating-plugin/Please note that Facebook login will not appear in the DS Login widget.
- When “Off”: This feature will be deactivated.
Password add on:
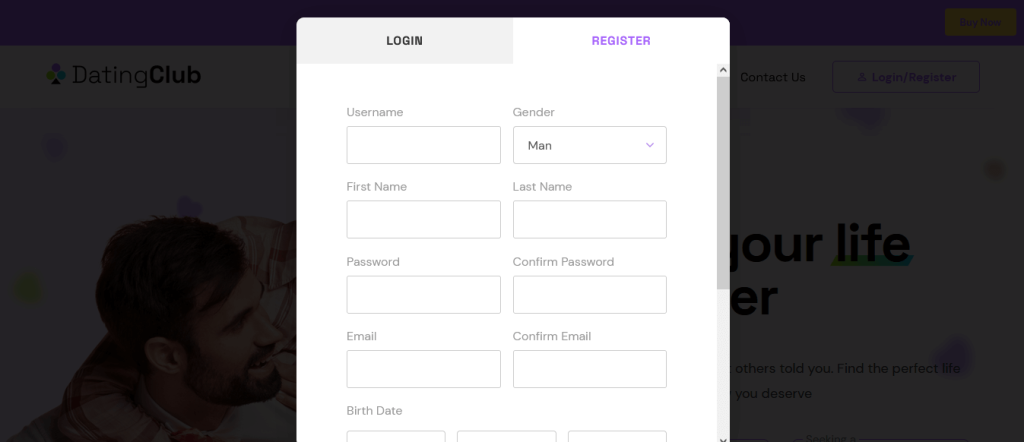
Password: This feature helps the admin to set a password field on the registration page for new members.
- When “On”: Password input and confirm password field will be shown on the register page. After the user registers, he/she is directed to the “Edit Profile” Page.
Click on the image to enlarge
- When “Off”: Input fields for password and confirm password will not be shown and users will receive an auto-generated password in their email address.
Note: Password Add-on must be purchased to use this feature.


